Expenses & Income
View, add, and manage all your transactions. Switch between Expenses and Income tabs, with support for multiple currencies, categories, tags, projects, and expense splits.
Transaction List
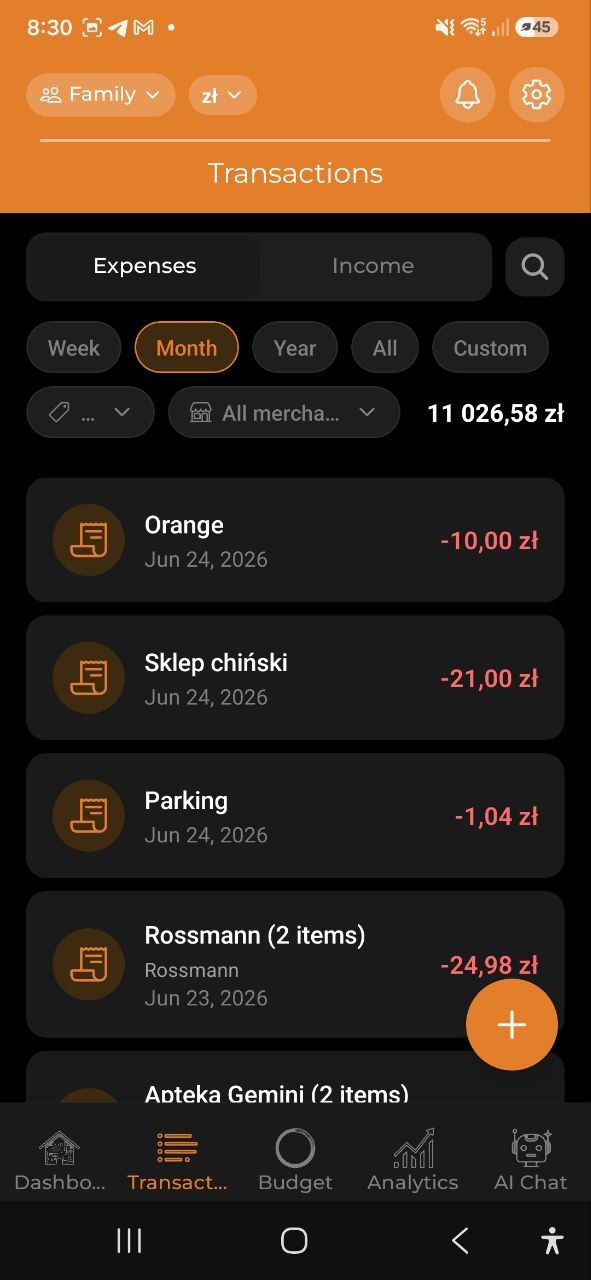
The Transactions screen has two tabs at the top: - Expenses — all your expenses, sorted by date (newest first) - Income — all your income entries
Each transaction shows: - Category icon - Description (e.g., “Hosting”, “Rent”, “Kindergarten”) - Date - Amount with currency, color-coded: red for expenses (e.g., -3 750,00 zl), green for income
Tap any transaction to view its full details.
Quick Actions (Long Press)
Long-press any transaction in the list to open a quick action menu: - Edit — open the transaction in edit mode - Duplicate — create a new transaction pre-filled with the same data - Delete — remove the transaction (with confirmation)
Note: Duplicate and Delete are only available for account owners and editors.
Bulk Actions
For expenses, the long-press menu also includes Select multiple. Tap it to turn on multi-select mode: - Tap rows to check the ones you want, or use Select all to check everything - The bottom bar lets you act on all selected expenses at once: Set category, Add tag, or Delete - Tap Cancel to leave multi-select mode without making changes
Use the floating + button (bottom-right) to add a new transaction.
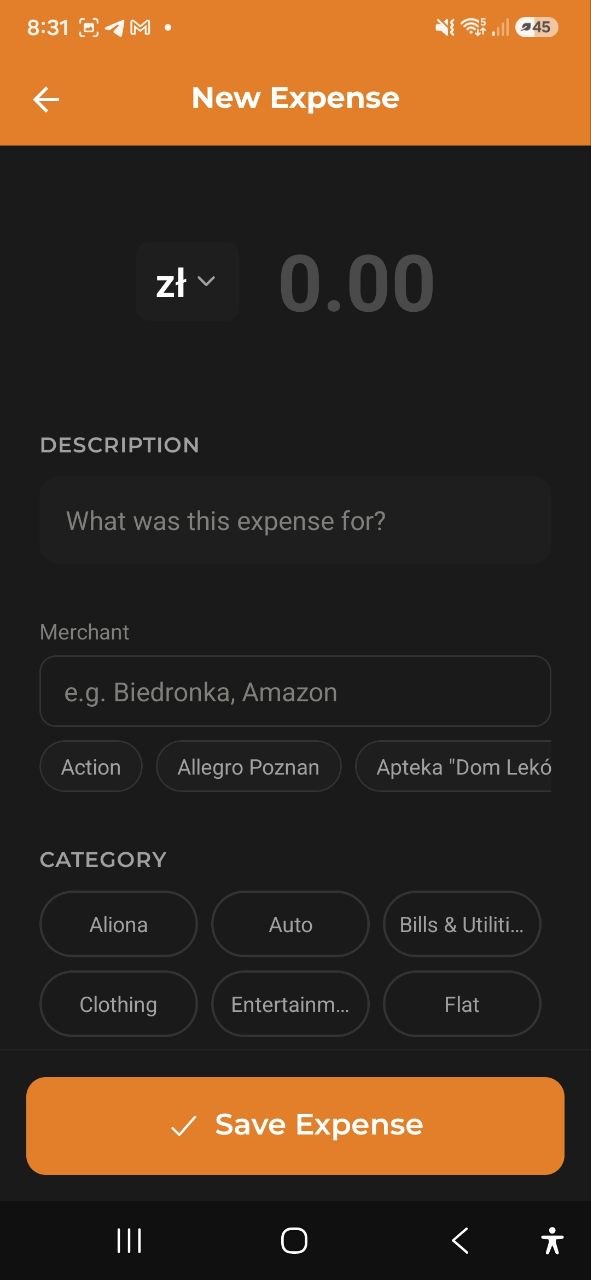
Adding a New Expense (Manual)
Step-by-step
- Tap the + button on the Transactions screen, or Add Expense from the Dashboard
- If using the + button, select Manual Entry from the menu
- Tap the currency symbol to change currency (USD, EUR, PLN, GBP, UAH, RUB, BYN)
- Enter the amount
- Enter a Description (e.g., “What was this expense for?”)
- Select a Category from the chips: - Food & Dining, Groceries, Transport, Shopping, Entertainment, Health & Fitness, Bills & Utilities, Education, Travel, Coffee & Drinks, Subscriptions, Clothing, Personal Care - Tap the + button to create a custom category
- Search and select Tags (e.g., #tea, #beer, #supermarket) — optional
- Select Add to Project (e.g., “Vacation”) — optional
- Tap Split Expense to divide the expense across multiple categories — optional
- Tap Save Expense
Categories
The app provides 14 built-in expense categories. You can also create custom categories by tapping the + button in the category selector. Each category has a unique color for easy identification in charts and lists.
Tags
Tags help you organize expenses with custom labels: - Search for existing tags using the search field - Select from recent or popular tags - AI may suggest relevant tags based on your description - Tags appear as chips (e.g., #tea, #beer, #supermarket)
Projects
Link expenses to projects for grouped tracking: - Select an existing project (e.g., Vacation) - Tap + to create a new project - View project spending totals in the Projects section - Change or remove the project later — open the expense, tap Edit, then pick a different project or tap Clear
Merchant
Track where you spent — the merchant (store or business): - Auto-filled when you scan a receipt or import bank/Wise transactions - Add or edit it manually on any expense; start typing to pick from merchants you’ve used before - Shown on the expense and in the list; tap the merchant filter on the Expenses tab to see all spending at one merchant - The merchant filter lets you pick several merchants at once (untap to remove one), and the Expenses tab shows the total of what’s currently filtered, converted to your main currency - Manage your merchants in Settings → Merchants: rename, merge duplicates into one, or remove a merchant - When you scan a receipt or use voice, the merchant is matched to your existing ones so you don’t get duplicates
Split Expense
Divide a single expense across multiple categories: 1. Tap Split Expense on the expense form 2. Add categories with amounts or percentages 3. The total must equal the original expense amount 4. Tap Confirm Split
Tip: Use Suggest Split to let AI recommend how to divide the expense.
Adding Income
Step-by-step
- Go to Transactions tab and switch to the Income tab
- Tap the + button
- Tap the currency symbol to select your currency
- Enter the amount
- Enter a Description (e.g., “What was this income for?”)
- Select a Category: Salary, Freelance, Investments, Gifts, or Other Income
- Add optional Notes
- Tap Save Income
Expense Details
Tap any expense to view its full details:
- Description and amount with currency
- Date of the expense
- Category with color indicator
- Notes (if added)
- Added by — shown in shared accounts; displays the name of the account member who created this entry
- Sync Status — pending, synced, conflict, or error
- Source — Manual Entry, Voice Input, Receipt Scan, or Imported
- Receipt Items — individual items (for scanned receipts)
- Receipt Image — view, share, save to gallery, replace, or delete the receipt photo. PDF receipts show a document preview with tap-to-open. If no receipt is attached yet, tap Attach Receipt to add one — choose Take Photo, Choose from Gallery, or Choose PDF. Works for any expense, including ones added manually
Actions on expense details:
- Edit — modify the expense
- Copy — create a duplicate
- Delete — remove the expense (with confirmation)
Income Details
Tap any income entry to view details: - Description, date, category, notes - Added by — in shared accounts, shows who created this income entry - Edit or delete options
FAQ
-
Q: Can I add expenses in different currencies? A: Yes! Tap the currency symbol on the expense form to switch between USD, EUR, PLN, GBP, UAH, RUB, and BYN.
-
Q: How do I edit an existing expense? A: Tap the expense in the list to open details, then tap Edit.
-
Q: What’s the difference between categories and tags? A: Each expense has one category (e.g., “Food & Dining”) but can have multiple tags (e.g., #lunch, #work). Categories are used for budgets and charts; tags provide additional filtering flexibility.
-
Q: Why does the Transactions tab open instantly, even with no internet? A: The app stores your transactions locally on your device. When you open the tab, the list is shown immediately from this local copy, and any new changes from the server are loaded in the background. If the list is empty on first launch, you’ll see a brief loading spinner while the device fetches your data.
See also: Voice Input & Receipt Scanning | Budgets