Voice Input & Receipt Scanning
Let AI do the work. Speak your expense naturally or photograph a receipt — the app extracts amount, description, merchant, and category automatically.
Voice Expense

How It Works
- Tap Voice Input from the Dashboard quick actions, or tap + on the Transactions screen and select Voice Input
- You’ll see a large microphone icon with the text “Tap to start speaking”
- Tap the microphone button to start recording
- Speak naturally, for example: “Coffee at Starbucks, five dollars”
- Tap again to stop recording
- The app processes your speech and extracts expense details
Confirmation Screen
After processing, you’ll see a confirmation with the parsed data:
- Amount — extracted from your speech (editable)
- Description — what the expense was for (editable)
- Merchant — where you spent (editable)
- Category — automatically assigned (editable)
- Confidence indicator — High confidence or Medium confidence
Review the details, make any corrections, then: - Tap Save Expense to confirm and save - Tap Try Again to re-record
After saving, you can tap Add Another to record a new voice expense.
Tips for Best Results
- Speak clearly and include both the item/description and the amount
- Include the merchant name if relevant (e.g., “Lunch at McDonald’s, twelve euros”)
- Specify the currency if it’s different from your default
- Keep it simple — one expense per recording
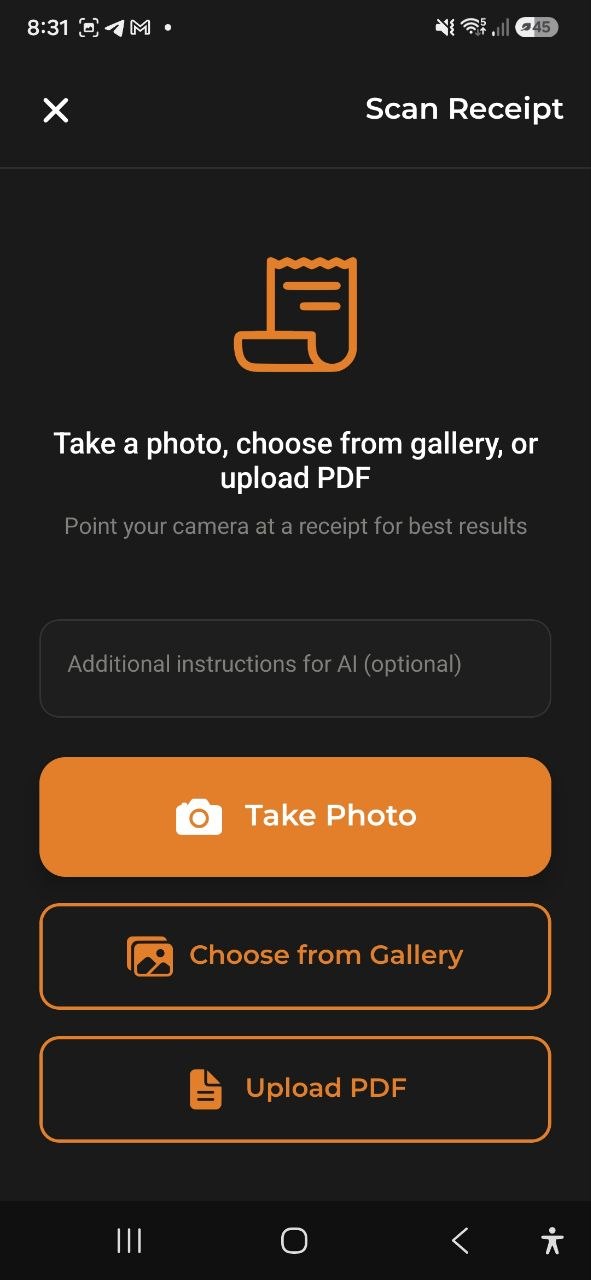
Scan Receipt
How It Works
- Tap Scan Receipt from the Dashboard quick actions, or tap + on the Transactions screen and select Scan Receipt
- You’ll see three options: - Take Photo — opens your camera to photograph the receipt - Choose from Gallery — select an existing photo - Upload PDF — pick a PDF file (digital invoices, scanned receipts up to 10 MB)
- Optionally, enter Additional instructions for AI (e.g., “Split equally between two people”, “Ignore the tip”)
- The app analyzes the receipt and extracts data
Confirmation Screen
After AI analysis, you’ll see:
- Total Amount — extracted from the receipt (editable)
- Description — generated summary (editable)
- Merchant — store/restaurant name (editable)
- Category — automatically assigned (editable)
- Date — from the receipt (editable)
- Items — individual line items with quantities and prices (if detected)
- Discount — discount amount (if present on receipt)
- Confidence indicator — High or Medium
- Save receipt image toggle — keep the photo attached to the expense
Review and correct any details, then: - Tap Save Expense to confirm - Tap Scan Again to try a different photo
Tips for Best Results
- Photograph in good lighting — avoid shadows and glare
- Ensure the entire receipt is visible and flat
- Hold the camera steady to avoid blurring
- Use Additional instructions for AI for special handling (e.g., “This is in EUR”, “Ignore the first item”)
Voice Income
Capture received payments by voice — same flow as Voice Expense, optimised for income.
How It Works
- Tap Voice Income from the Dashboard quick actions, or tap the microphone icon in the Add Income form footer
- Tap the (green) microphone button to start recording
- Speak naturally, for example: “Received 500 from client, consulting fee”
- Tap again to stop recording
- The app extracts the amount, description, and best-matching income category
Confirmation Screen
- Amount — extracted from your speech (editable)
- Description — what the payment was for (editable)
- Category — income category automatically assigned (editable)
- Currency — detected or defaulted to your base currency
Tap Save Income to confirm, or Try Again to re-record.
Tips for Best Results
- Mention the amount and a brief description
- Mention the currency if it differs from your default
Scan Invoice
Photograph or upload an invoice or payment document to capture income automatically.
How It Works
- Tap Scan Invoice from the Dashboard quick actions, or tap the document icon in the Add Income form footer
- Choose Take Photo, Choose from Gallery, or Upload PDF
- Optionally, enter additional instructions for the AI
- The app extracts the total amount, date, and category
Confirmation Screen
- Total Amount — extracted from the document
- Description — generated summary
- Category — income category automatically assigned
- Date — from the document
Review the details, tap ✓ to save or the pencil icon to open the full Add Income form with the data pre-filled.
Note: Invoice OCR extracts the total and date only. Line items from invoices are intentionally ignored to avoid double-counting on multi-line billing documents.
FAQ
-
Q: Which languages does voice input support? A: Voice input works best in the language your app is set to. It supports all 8 app languages.
-
Q: Can I scan receipts in any language? A: Yes, the AI can process receipts in most languages and will extract amounts and items regardless of the receipt language.
-
Q: What PDF files are supported? A: Both digital PDFs (e.g. Amazon or PayPal invoices) and scanned PDF receipts are supported. Maximum file size is 10 MB. Digital PDFs with selectable text are processed faster and more accurately. For best results with scanned PDFs, make sure the scan is clear and high-contrast.
-
Q: Why was the amount wrong after scanning? A: AI extraction isn’t always perfect. Always review the confirmation screen and correct any errors before saving. Blurry or damaged receipts may produce less accurate results.
-
Q: Does voice/receipt scanning use my AI requests? A: Yes, each voice input or receipt scan uses one AI request from your monthly allowance.
See also: Expenses & Income | AI Chat